
Here's the Long Story Short
Tweaking our platform over hundreds of custom projects revealed patterns about what clients really want. Having to balance ever-growing functionality needs and usability for non-coder end users resulted in a web CMS that stays friendly as you try to scale beyond a presentation website. This is exactly where other popular CMS alternatives start requiring coding and web builders stop being able to handle it.
Now you can benefit from all the advantages of a genuine web CMS for longer, while still getting to drag & drop stuff, but in the back end where it should happen. Sure, specific and complex tasks will eventually set a limit to non-coding, the point is you can do so much more without rolling up your sleeves than with any other real content management system.
To get the basics, you should at least read these brief articles (~ 10 min), they prove the advertised short learning curve and also create the big picture in which granular details can be understood much easier down the road.
Pages are made from instance & global modules
Each website template comes with a number of CMS instance and global modules. When you create or install a module, you're actually making the main part of a web page, in a default version without content, to which you can later add optional sections and voila, it's done!
This is the major difference between the main CMS modules:
- Instance modules: you have to manually create pages, e.g. Blog, Gallery, etc. - located in the left side column (1).
- Global modules: pages get created automatically on installation, e.g. Users, E-Shop, etc. - located in the top menu (2).
The CMS interface has four distinctive areas
Click items in the left side column or top menu, click what tabs appear, edit and save. That's mostly everything you'll be doing!
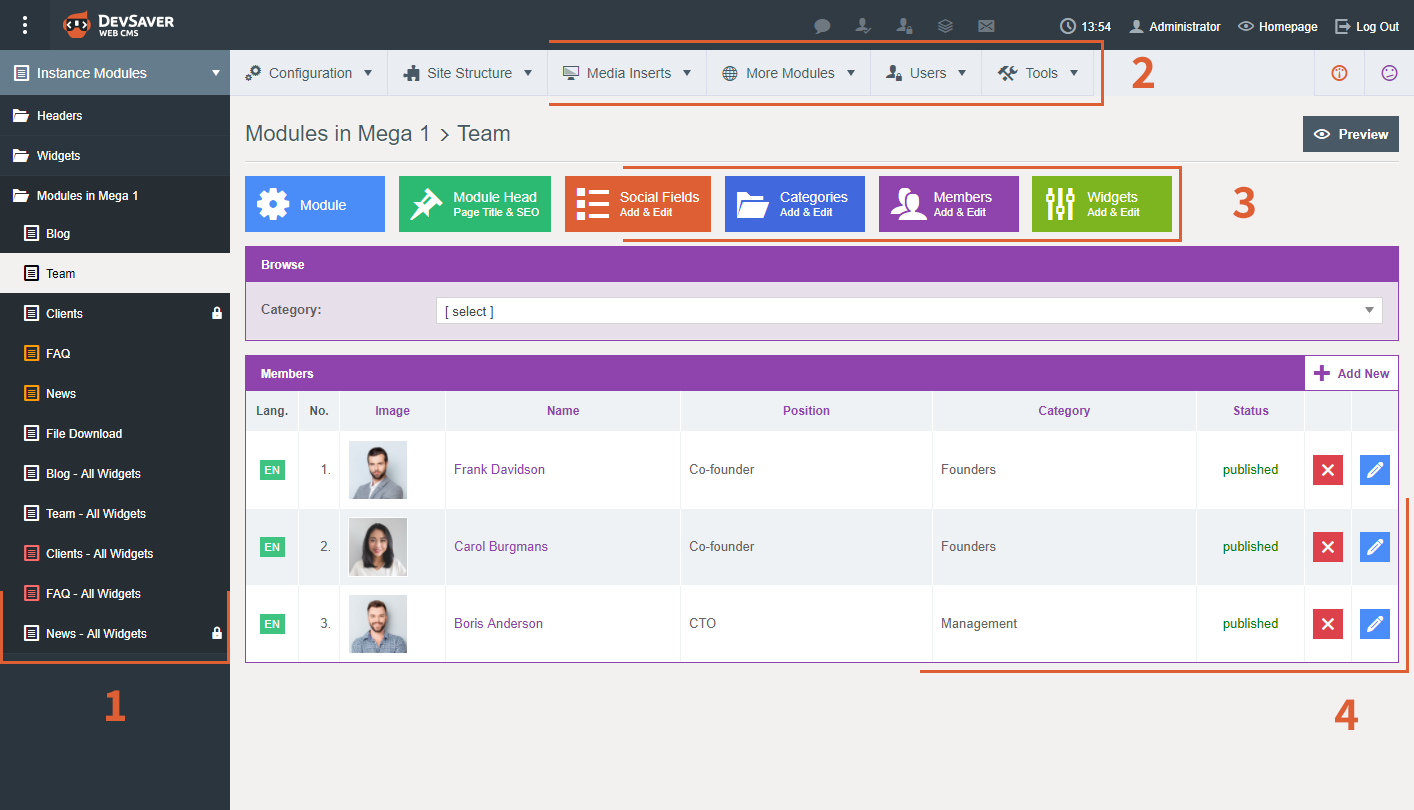
1 - the retractable left side column with either all the instance modules you create or all the menu items, depending on the option selected in the upper-left drop menu.
2 - the top menu.
3 - the tab bar of the selected option from either area 1 or 2.
4 - the settings and content area.
Click the tabs (3) to access different settings and content areas (4). You can recognize which tab you are on by color association, e.g. if you click the green tab, all the boxes below the tab bar will be green.
These buttons are in every list box
You'll notice these in the settings and content area (4). This is what they do:
 - orders the item list ascending or descending (click the column titles).
 - deletes any item.
 - triggers the edit section of any item directly.
 - triggers the details section of any item that you can later edit.
 - duplicates any item.
 - vertically drags & drops any item and changes its order on the front end.
 - previews the item on the front end.
 - downloads any attached file.